Taking my TJ07 to the watcooling extreme

Deathspine

Obliviot
Thanks for sharing

NICE JOB! I will be studying this one for a few days. Really planning to add a radiator to the top of my TJ07. Plan to copy yours but with two 120s radiator not three. Hope to just use the present opening at the top. Very much like the way you did that.
 

NicePants42

Partition Master
NICE JOB! I will be studying this one for a few days. Really planning to add a radiator to the top of my TJ07. Plan to copy yours but with two 120s radiator not three. Hope to just use the present opening at the top. Very much like the way you did that.

What you are planning shouldn't be a problem. A BIP with 25mm fans or an MCR with 20mm fans should fit without issues, and there are a lot of easy ways to get more space for MCR+25mm fans, like this, for example.

Man, That's a SWEET Build
I'll be looking for the benches

Merlin
Glad you like it. One thing that I may change in the future is the way I use the ports on the reservoir. I think the current reservoir orientation is good, but I think bleeding would be easier if the fill tube was attached to the top port instead of the side. The way it is now, there is still a small air bubble in the top of the reservoir. I tried turning the pumps up to setting 3 last night, and the air that was left in the top of the reservoir was quickly pulled down into the pumps.

So far I've managed to test the CPU at 3.474Ghz, but it seems to require a lot of voltage, so I'll need to read up on overclocking the IP35-Pro.
 

Greg King

I just kinda show up...
Staff member
We should be posting my review of the IP35-Pro in the coming week... is there anything that you would like to know?

That aside, spectacular work log and the final PC is proof of your skill. Well done.
 

Deathspine

Obliviot
Still NICE

I continue to study your project with much interest. I was wondering if you could share some information about the QDs (quick disconnects) in your system. I have never heard of those before and it does sound like a very useful idea especially given the frequency one usually mess with the system as one make those constant grades.

Thanks
 

NicePants42

Partition Master
I continue to study your project with much interest. I was wondering if you could share some information about the QDs (quick disconnects) in your system. I have never heard of those before and it does sound like a very useful idea especially given the frequency one usually mess with the system as one make those constant grades.

Thanks
No problem. These QDs are made by Colder, and are considered to be the best choice for PC water coolers because they are industrial grade parts, and supposedly have compartively low flow restriction. I got these from McMaster Carr, who's catalogue has some more detail.

McMaster.com, catalogue page 174 should be informative. The part numbers I used in the build (you can just type these numbers into the search field at mcmaster.com):

51545K34 - Basic socket for 3/8" coupler, with 1/2" barb and shut-off valve
51545K36 - Panel mount socket for 3/8" coupler, with 1/2" barb and shut-off valve
51545K54 - Basic 3/8" coupler with 1/2" barb and shut-off valve
51545K56 - 90-degree 3/8" coupler with 1/2" barb and shut-off valve

These are also available without shut-off valves, although that pretty much defeats the purpose of having them because you don't want liquid spilling everywhere when you disconnect them.

Edit: I use McMaster Carr because they are so close that I get next day delivery via ground. Also, they are very, very nice about letting me return things. I'll tell you something embarrassing: At first I purchased the straight-thru connectors (without shut-off valve). McMaster let me return the order. Then, I ordered extra QDs (realized later that I could use one socket and one plug on each part of the loop, reducing the extra parts I need to fill/bleed) and I also ordered 3/8" to 1/4" thread reducing fittings for the MCR320s that it turns out I didn't need (Swiftech is now using 1/4" BSPP threads on all their rads now) so I sent back more stuff. I had zero problems sending the stuff back and getting credited. McMaster Carr is made of win.
 
Last edited:

Tech-Daddy

Tech Monkey
That thing is a stunner, excellent work through out!
*applause*

Great job! You are making me think about QD's in my next build.... ;)
 

NicePants42

Partition Master
They are extremely helpful. I still have to deal with all the wiring/connections, but not having to drain the entire loop to swap hardware is great.

I just pulled out the motherboard to remount the CPU block, and I'll be adding some lighting ~Tuesday. I've also relocated the fill port to the 'top'-most reservoir port (for better bleeding), but I want to use 3/8" tubing to help reduce the kinking from the sharp bend, so the 3/8" barbs will be here ~Tuesday as well.

Coming from using UV red coolant, I have to say that Pentosin G11 kicks ass. Even with only a ~6.6% concentration, it lights up extremely well. I'm looking forward to getting the lighting done and posting more pics.
 

NicePants42

Partition Master
Fillport moved and lights added

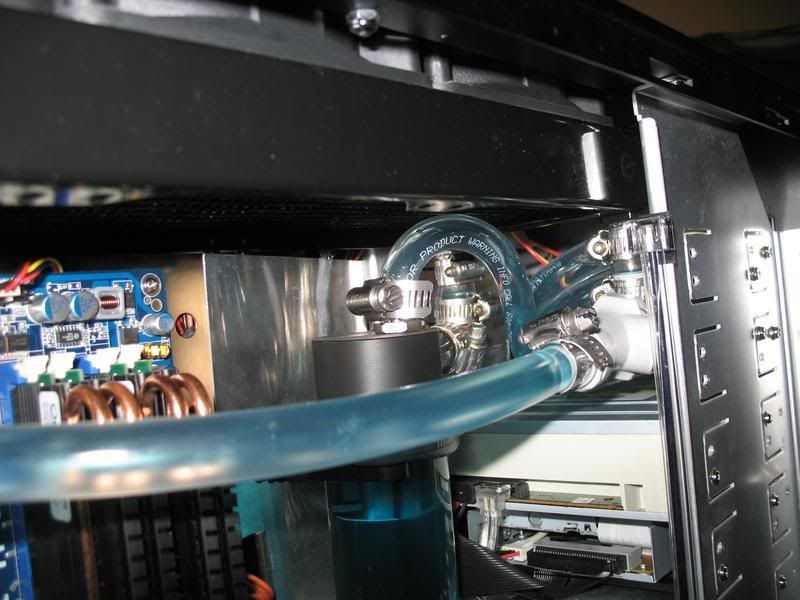
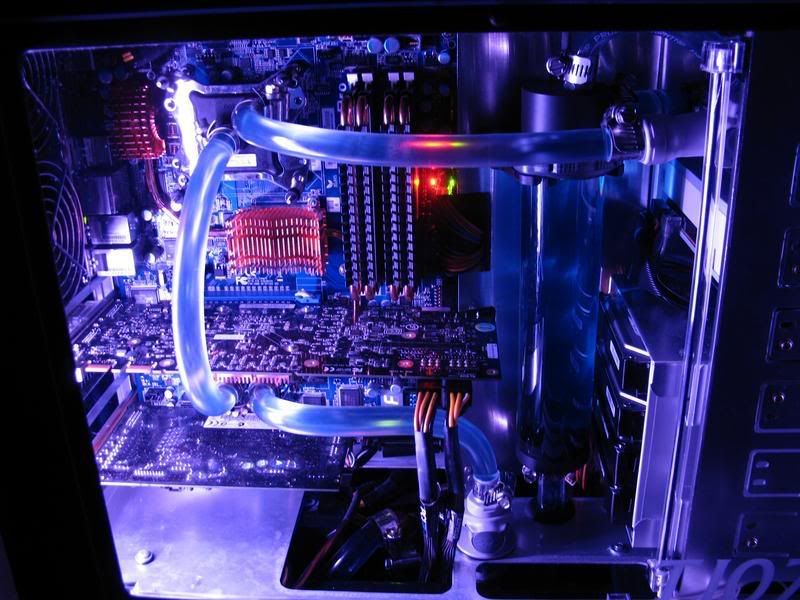
Ok, so I wanted to try and make this thing easier to bleed, so instead of using the two side ports on the top of the reservoir, I decided to try using one side port (for the return) and the top port for the fill/bleed line. With the revision 2 'base', there is a large-ish wall separating the two side ports, so I used the ports such that the fill line and return line were on the same side of the wall, in an effort to prevent air from getting trapped on the other side of the wall.

IMG_2483.jpg

That's how it looks now. It's still a PITA to bleed, but I found that I could trap air in the reservoir by laying the case so that the window is facing up while the system was running, then when I shut the system off and righted the case, the bubbled went straight to the bleed line. Good enough, I guess. To prevent the bleed line from kinking, I used 3/8" ID x 5/8" OD tube.

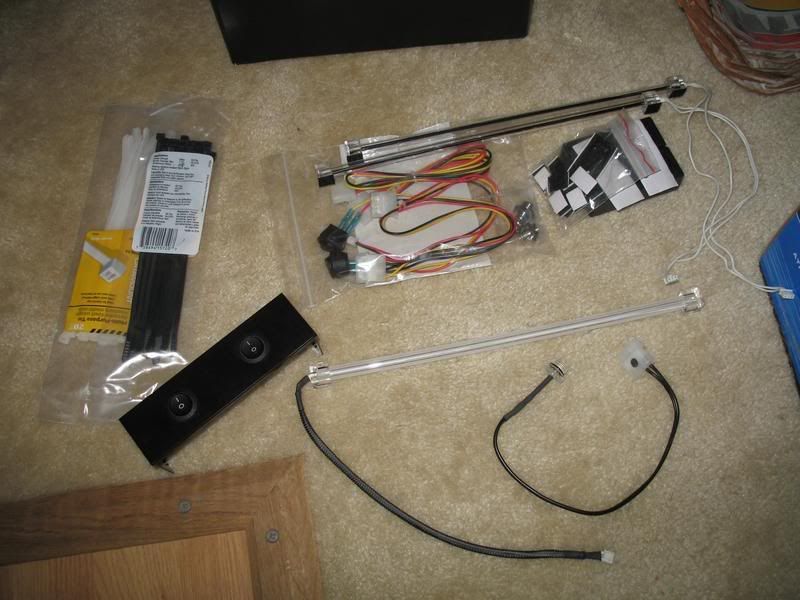
When I ordered the 3/8" barbs, I also got some lights.
IMG_2482.jpg

I ordered a white cold cathode, some switch wiring (which I lengthened myself) and a UV LED that fits into a clear G1/4 plug, with the idea that this would look neat mounted in the top of the reservoir. The front panel with the switches came with the case when I got it from the previous owner.

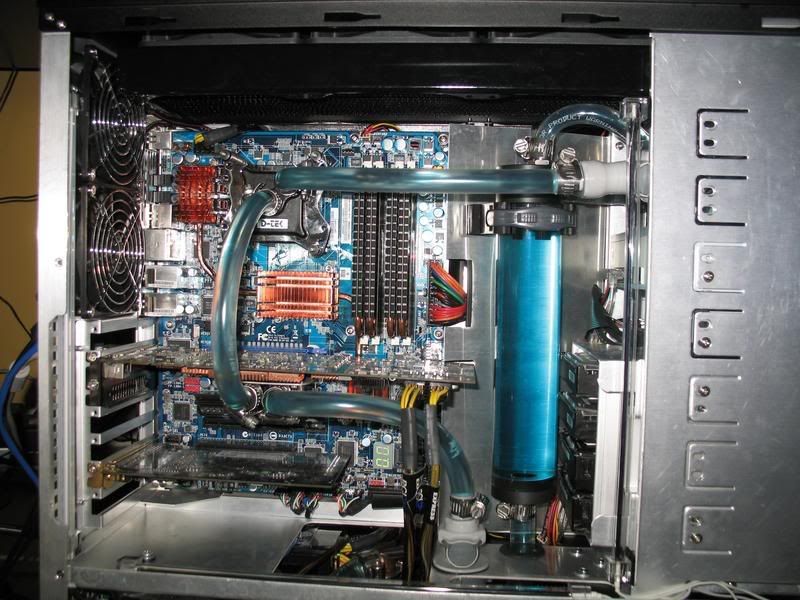
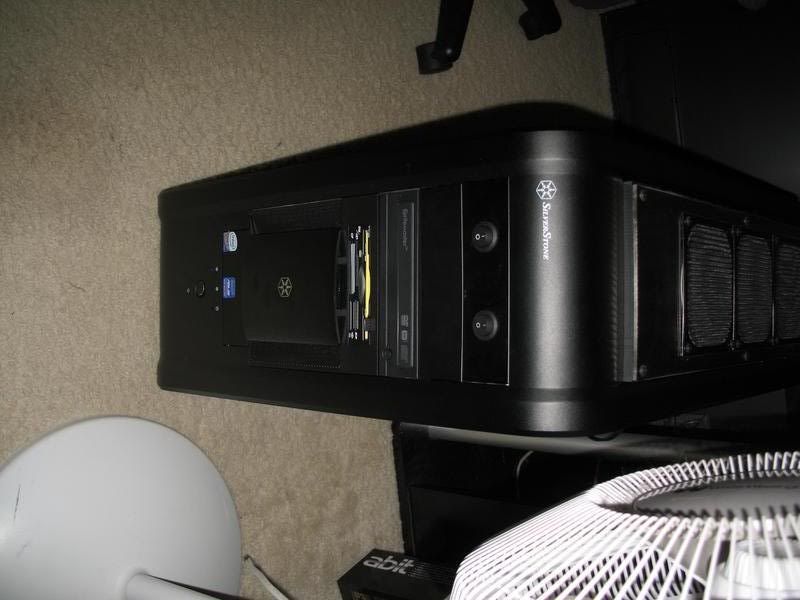
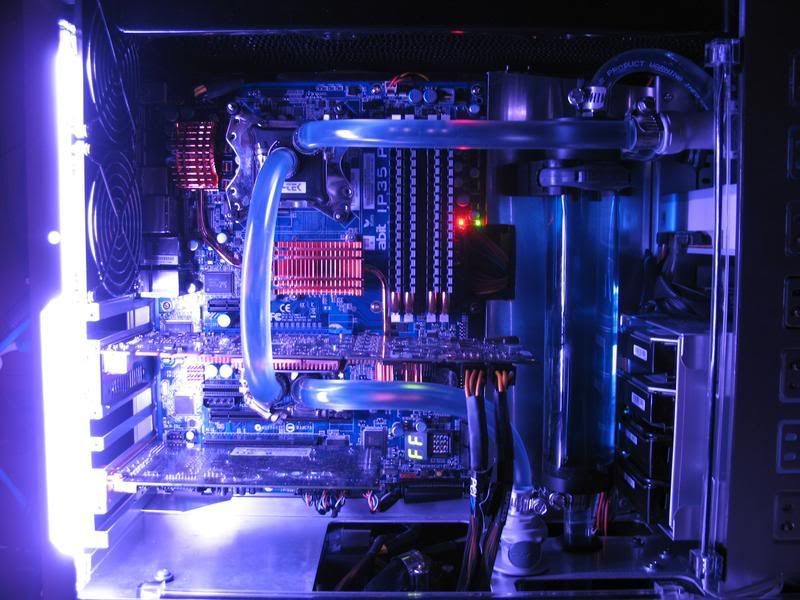
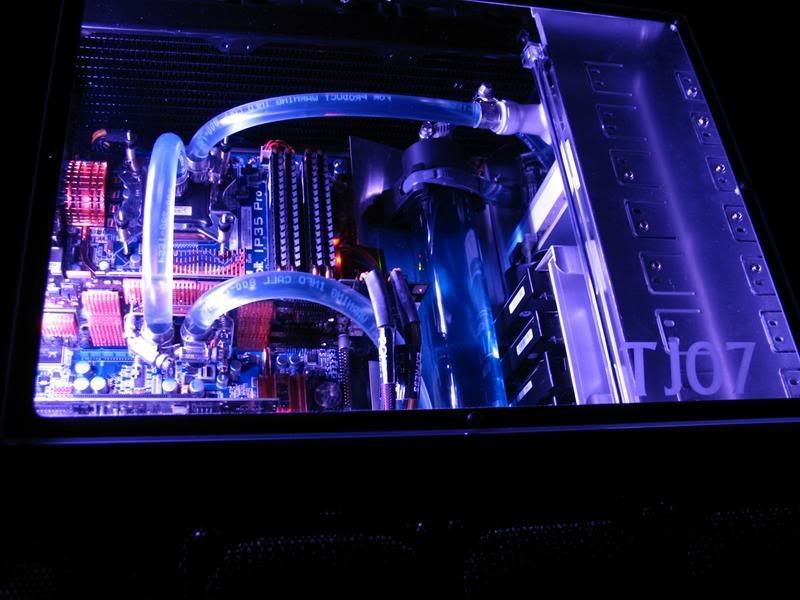
The lights were easy to set up. Here are some shots of how the rig looks now.

IMG_2491.jpg


IMG_2484.jpg


IMG_2485.jpg


IMG_2487.jpg

The white light looks a lot better in person, and helps me hook up cables in the dark.

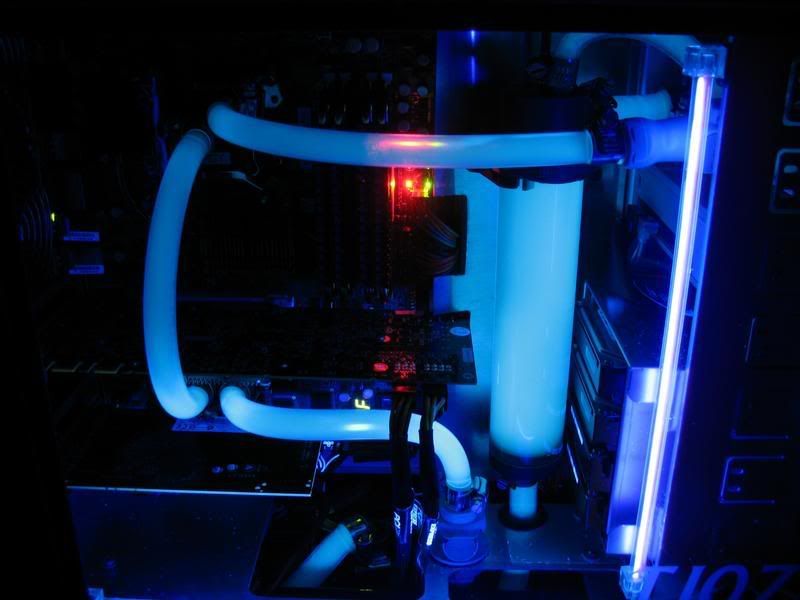
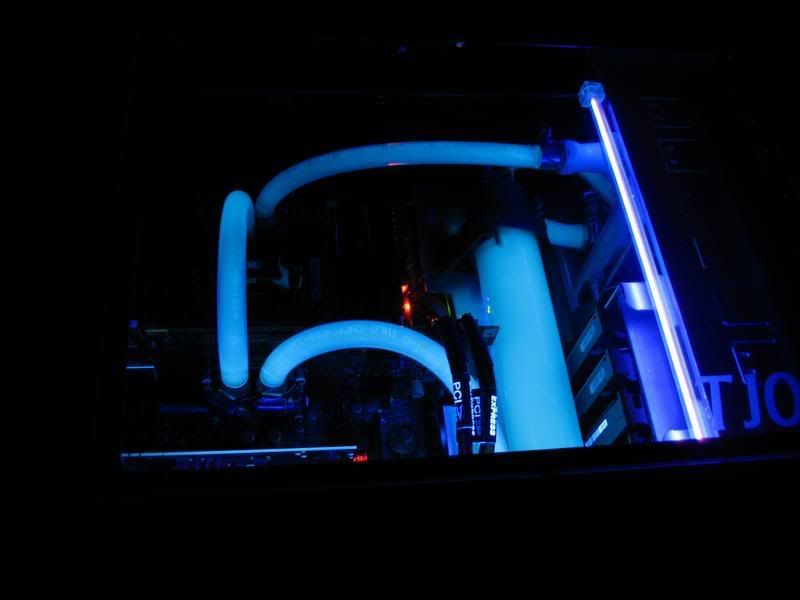
*Edit: Good UV pics are a couple posts down.

I'm pretty happy with the way that the UV looks - it's miles better than my old 'red' setup.

*EDIT: One thing I forgot to mention - that UV LED and clear G1/4 plug is made by Alphacool, and in my opinion the LED is much too weak. I didn't wire the LED to s switch, so it's always on, but I can't see any effect whatsoever, even looking at the reservoir at an angle to see up to the top. It's crap, and I'll replace it with a temperature probe if I ever add a flow meter or front LCD monitor.

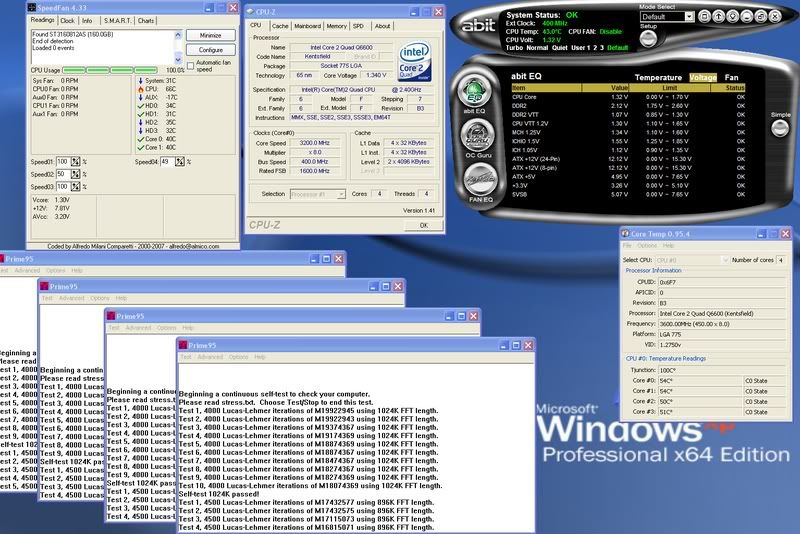
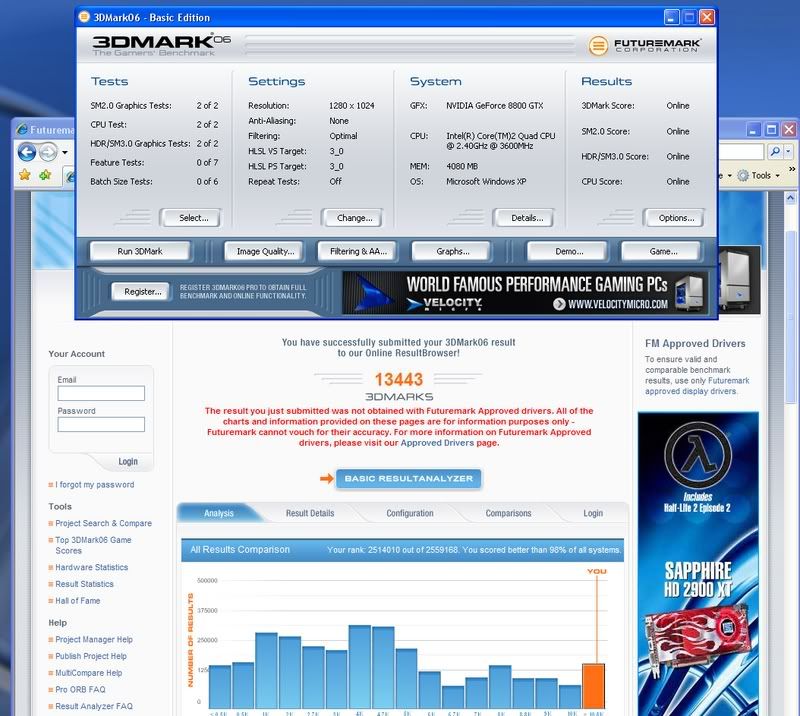
Now I'm trying to get the stable overclock dailed in. I'm currently running the CPU at 3.2Ghz @1.4V, and the 8800GTX is probably going to top out ~660/940. CPU load temps are 55C according to CoreTemp (this is a B3 Q6600), and the 8800GTX load temp never exceeds 46C with full system load according to AtiTool. I'll try to get some screens of this posted shortly.
 
Last edited:

Rory Buszka

Partition Master
Hi, guy.

The only thing I think I'd change if I had the opportunity is that I'd reverse the fans on the top radiator so they're sucking air from the radiator and blowing it out the top of the case. I don't know if it would make a difference, but warm air naturally rises, so you'd be drawing the heat straight out of the case instead of blowing it back in. This isn't a high-priority change, though -- that's a phenomenal system, and you deserve to enjoy it for a few weeks before you go changing anything.
 

NicePants42

Partition Master
The only thing I think I'd change if I had the opportunity is that I'd reverse the fans on the top radiator so they're sucking air from the radiator and blowing it out the top of the case. I don't know if it would make a difference, but warm air naturally rises, so you'd be drawing the heat straight out of the case instead of blowing it back in. This isn't a high-priority change, though -- that's a phenomenal system, and you deserve to enjoy it for a few weeks before you go changing anything.
Thanks for your recommendation. I understand what you are saying, and this change would work. I will explain why I set it up with the fans blowing in.

I wanted to maintain positive pressure in the top of the case in order to help prevent dust from being sucked in between the nylon spacer plate and the top sheet of Plexiglass. This will happen eventually (because small particles of dust that came through the filters will get in there on it's way out of the case), but I'm trying to delay it. In general I prefer positive case pressure with filtered air over other options.

So, with the top fans exhausting, and the HDD fan sucking, I'd need to have the 92mm fans on the back as intakes, and I'd probably have to run them fairly fast to maintain positive pressure. These are quiet 92mm fans, but they're audible at full speed. As it is now, the 92mm fans do a good enough job exhausting at low speed, and I get my positive pressure.

Also, the most efficient way to cool a radiator is with the coolest air available - and with a 3x120mm opening in the top as an intake, the entire system can benefit from a steady supply of cool air, (instead of a 2x92mm surface at the top rear) which is then exhausted out the back (either through the 92mm fans or through the open PCI slots).

I judged that I would have more efficient cooling with (slightly) less noise while maintaining positive case pressure using filtered air with the current setup. I'm sure that your suggestion would work, but at this point the only thing I plan to change in the near future would be adding a nozzle to my Fusion.
 

NicePants42

Partition Master
Well, here's about where I'm at with the load temps.
32Ghz141VcoreLoadtemps.jpg

Room temp is ~23.5C.
These B3 cores aren't the best when it comes to temps, but 3.2Ghz is nice. I haven't had loads of free time lately so trying to get a higher stable OC isn't that critical to me at the moment. The 8800GTX is at 638/938 at 45C load according to AtiTool and has been running stable for a while now under load.

Here's 3Dmark06 with Q6600 @ 3.2, RAM at 800mhz (4x1gb doesn't seem to want to play) and the 8800GTX @ 638/938. These are my 24/7 settings.
Screenshot-3DMark06-32GhzDDR2800880.jpg


I also took better night shots of the rig. I'm going to edit out the crappy ones in the previous post. Enjoy.

IMG_2507.jpg


IMG_2509.jpg


IMG_2520.jpg


IMG_2515.jpg


While I was at it I took a shot of my modded G15.
IMG_2525.jpg

Now that my color scheme no longer includes red, I may need to get another one of these. :D
 
Last edited:

MakubeX

Partition Master
Rooms temps? Always need to know room temps along with PC temps to have a point of reference. ;)
 

Merlin

The Tech Wizard
I see the room temps at 23C and the CPU cores running at 45C on one diagram, and the Intel chart shows all four cores running from 50C to 54C.
What is that one reading at 100C?
I had to use the zoom to get in there to see the readings.
So 73*F room temp to 129*F is only a 56*F differential.
I'm very impressed by the whole build and the lights put the final touch to a fantastic system.
If they had a SEMA for computers, yours would be in the top.
And the presentation here at Techgage was as well top notch

Merlin
 

NicePants42

Partition Master
Coretemp is showing 54-55C, and I trust that program more than the others.
What is that one reading at 100C?
Tjunction relates to the calibration of the reported temps. I am not familiar enough with CoreTemp to understand it's exact function or to change it.

Speedfan's readings are all suspect (the CPU reading fluctuates from 123C to -71C) but it's HDD readings seem pretty stable. I included it because I could, and because it clearly shows 100% CPU usage.

Abit's Uguru utility is pretty nice, and appears to report voltages very precisely (I have CPU voltage set to 1.4 in the BIOS, talk about vdroop!) so I included the voltage montior. Uguru reports CPU load temps at ~43C, which is obviously too low.

In the end, all the temp readings are suspect anyway, so I figured I'd include a bunch.

A little more info: both MCP655s are running on the '2' setting, and the fans are running somewhere in the vicinity of ~7-9V (I can't really tell because all I have on the back are knobs). I'm very pleased with the noise level at this point, and in particular I think the PSU I'm using is fantastic with regard to noise - even with all cores at 100% and scanning for artifacts on the 8800GTX, the PSU is completely inaudible. PCP&C, take note!
 
Last edited:
Top