The Sleeper

Rob Williams

Editor-in-Chief
Staff member
Moderator
Dude, this mod is coming along nicely :D

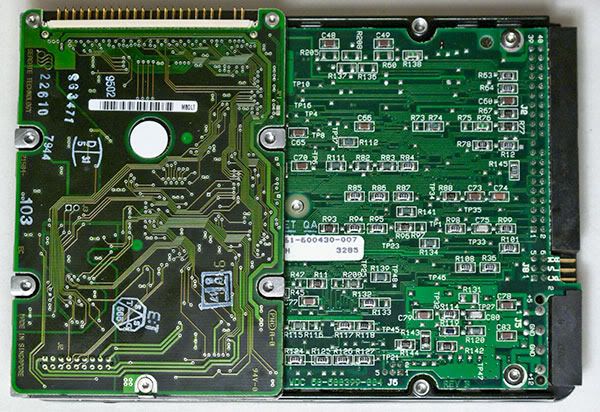
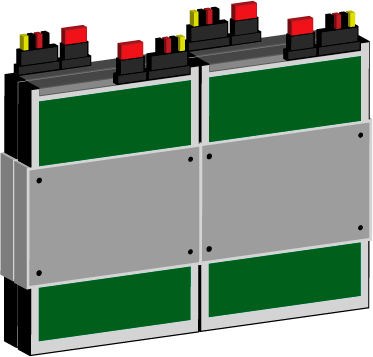
Great idea on side-mounting the hard drives there, seems like such a simple solution, but effective. Is there any concern of heat with the bottom of the mount being rather solid, or does that side generally not generate too much heat to begin with? (This is not something I've ever considered, but the lack of airflow scares me a tad :p).

The chassis itself is looking amazing, black seems so simple, but elegant at the same time. I absolutely love it.
 

Tech-Daddy

Tech Monkey
Thanks Rob! Yeah, the drives will generate heat, especially that 80GB OEM Raptor that I have. To help combat it, the drives will actually be mounted on short nylon spacers to give them some airflow underneath. If I build the hard drive cover right, there will be a minor air scoop at the front of it, that will act as an air intake off of the fans on the back of the front rad. I'm thinking only about 1/3 of the fan surface area will be covered, redirecting that airflow down into the drive area. I'm hopeful that will be enough.

:)

The black was chosen because one night I watched a very unassuming all black car absolutely smoke what appeared to be a much hotter "hot rod" of a car. It wasnt until afterward, when I spent a little time with the guy at the end, that I realized, the unassuming car was a beast... and the black allowed the shadows to hide many of the tweaks. Was very impressive stuff. So now, I am trying to channel that inspiration here!

Glad you like it!
 

Tech-Daddy

Tech Monkey
*RANT*
I now remember why every machine up until this point has been an AMD rig. They stick to a socket type!

Because I have been out of the mix on the intel side of the equation, I did not realize that the *new* i7 processors are actually across 2 different socket types!!! 1156 and 1366!!! WTF??!?! This frustration stems from the fact that I was all excited! I won an i7-975EE processor and was looking forward to dropping it into my *new* (as in recently released) Asus P7P55D Premium http://usa.asus.com/product.aspx?P_ID=kvkzMAsYAaWQ0z8M&templete=2 . Guess what? 1156 don't work!!! ARGH!!!
One processor, 2 different socket styles that have no compatibility crossover...

Add into that, the CPU cooler that I purchased that is 1156/1366 compatible... *only* came with a 1366 back bracket! Oh yeah, the top CPU bracket can adjust to either of the hole sizes, but it only came with a 1366 bracket! The advertisement said the block was i7 mounting compatible. My AMD thinking said... "Good, I'm buying the right part!" .... DENIED!!!!!!!

Grrrr..... now I have to locate a 1156 back plate or build one myself. How frikken confusing!

To add insult to injury, the only place I have found the 1156 back plate was going to charge me almost twice as much as the MSRP from Swiftech *and* add in $10 shipping!!! DAMN IT!!!

*end rant*
 

Rob Williams

Editor-in-Chief
Staff member
Moderator
Ahh, I figured you'd do something like that with the HDD backplate... nice. I'm sure the airflow in the entire chassis wil be more than enough to keep the drives cool. It's just too bad that larger drives nowadays end up getting so warm even at idle.

Tech-Daddy said:
Grrrr..... now I have to locate a 1156 back plate or build one myself. How frikken confusing!

The Core i7-975 is LGA1366... you are already set there. The only thing you are missing is an LGA1366 motherboard :)

As much as I hate the differing sockets, I can understand why Intel took the route. Both LGA1156 and LGA1366 processors are quite a bit different, but I can understand how the equally-named Core i7 could confuse some people. It's the sockets people need to look for when purchasing a motherboard or CPU cooler, not the CPU model itself. Intel wasn't too smart with its naming schemes here.
 

Tharic-Nar

Senior Editor
Staff member
Moderator
Damn that sucks. Yeah the 2 separate sockets are an issue, since there is a few differences in architecture, what's strange is the 1156 will be the first to get the onboard GPU's later despite the lower pin count. The added insult of heatsink manufacturers declaring compliance but the product is only partially compliant is asinine and a few have done this. Some actually sell the mounts separately even though the heatsink has been out for over a year, they just never bother to include both mounts. Like extra fan brackets, they can charge more for parts than the working product itself. If you decide to make the bracket, you'll need some hard steel, like stainless or chrome/vanadium since mild will just warp (and possibly rust) under the pressure from the mounts (about 40lbs or force on the mounts?), just remember to use a non conductive spacer as well.

Have to say the vertical alignment of the drives is quite clever, I was wondering, are you going to include spacers between each drive to further increase airflow, not just underneath between the drive and support plate. Another suggestion would be the use of 40mm fans through a fan controller or a limiter to keep the revs down, or just use low rev fans (they are available, just avoid server fans) – but I don’t know if your design would allow the room. But I guess since you have the scoop underneath, a sufficient exhaust will pull air through and over the HDD’s (always better to have a negative air pressure through high exhaust than a positive pressure keeping air static, but you probably already know all this, lol). You could also use 2.5” drives to further save space if need be, but it comes down to cost at the end.

Watching these mods unfold really does get me wondering, but I just don’t have a workshop or garage to work in, let alone the tools.
 
Last edited:

Tech-Daddy

Tech Monkey
You just start somewhere.... that is all it takes! Dont have to go all out, and you can use the tools that you have to help decide what modding you want to take on!

Alright.... so, storming through my frustration in dealing with the non proper back plate and my CPU socket issues... I needed to mock everything up to see how it was all fitting together. See if I have any gotcha's that I have not thought of.


Mount the top rad (my new cross flow) into the top of the case:
sleeper_top_rad2.jpg


sleeper_top_rad3.jpg


This shot will show you precisely how much fan coverage the rad will get from above:
sleeper_top_rad4.jpg


So then, knowing that I do not have a back plate for my cpu cooler, I lay the case back at an angle so that the parts will stay put.

sleeper_mockup2.jpg


sleeper_mockup3.jpg


sleeper_mockup4.jpg


sleeper_mockup5.jpg


sleeper_mockup6.jpg


sleeper_mockup7.jpg


sleeper_mockup8.jpg


The blue of the rads works well with the onboard blue of the heatsinks and the slots. I'm liking the look.

Oh, and one other thing... that trick with the larger drill bit de-burring the edges of the smaller drilled holes...

Say "WHADDUP!" to the inspiration for the idea...
"WHADDUP, JOE?!"
sleeper_neighbor.jpg


;)
 

Optix

Basket Chassis
Staff member
Dude, that is one clean looking setup. Very nice. Folks are going to lose their marbles when they see the LED work combined with the rest of it.

Whaddup, Joe?!
 

Tharic-Nar

Senior Editor
Staff member
Moderator
Nice.... Blue and black all the way, it is extremely clean.

I don't know if it's the perspective, but isn't the ATX connector very close to the G.Skill fan, will it interfere or will the cable have sufficient flex to stay out the way...
 

Tech-Daddy

Tech Monkey
Nice.... Blue and black all the way, it is extremely clean.

I don't know if it's the perspective, but isn't the ATX connector very close to the G.Skill fan, will it interfere or will the cable have sufficient flex to stay out the way...

No worries about interference, It (if the plan goes as expected) should be coming from that side oval port from underneath the motherboard, exiting that oval hole and attaching to the motherboard.
.
:)
 
Last edited:

Tech-Daddy

Tech Monkey
Would look something like this:
sleeper_mockup9.jpg


sleeper_mockup10.jpg


These are using extensions made by NZXT (that I am currently reviewing for Modders-inc), I've simply put these in place to give you an idea of what they would look like.

sleeper_mockup11.jpg


Hope this helps... :)

-=CT
 

Tech-Daddy

Tech Monkey
Damn that sucks. Yeah the 2 separate sockets are an issue, since there is a few differences in architecture, what's strange is the 1156 will be the first to get the onboard GPU's later despite the lower pin count. The added insult of heatsink manufacturers declaring compliance but the product is only partially compliant is asinine and a few have done this. Some actually sell the mounts separately even though the heatsink has been out for over a year, they just never bother to include both mounts. Like extra fan brackets, they can charge more for parts than the working product itself. If you decide to make the bracket, you'll need some hard steel, like stainless or chrome/vanadium since mild will just warp (and possibly rust) under the pressure from the mounts (about 40lbs or force on the mounts?), just remember to use a non conductive spacer as well.

Have to say the vertical alignment of the drives is quite clever, I was wondering, are you going to include spacers between each drive to further increase airflow, not just underneath between the drive and support plate. Another suggestion would be the use of 40mm fans through a fan controller or a limiter to keep the revs down, or just use low rev fans (they are available, just avoid server fans) – but I don’t know if your design would allow the room. But I guess since you have the scoop underneath, a sufficient exhaust will pull air through and over the HDD’s (always better to have a negative air pressure through high exhaust than a positive pressure keeping air static, but you probably already know all this, lol). You could also use 2.5” drives to further save space if need be, but it comes down to cost at the end.

Great information and I am quoting it for peeps to emphasize these points! I am actually pondering dedicated fans for the drives, but I had not even thought about replacing them with laptop drives! 7200rpm units are there, and capable of my needed capacities. I dont run TB drives yet, so all of my existing drive sizes are likely within range. I do have an OEM Raptor (80GB) that will be in the mix, so that will not change... but maybe I can make something to replace 2 of the 3 drives....

Hrmmmm..... (scratches chin... ;) ) Thanks for the ideas!
-=TD
 

Tharic-Nar

Senior Editor
Staff member
Moderator
The advantage with the 2.5" drives is that you can fit 4 of them in the same space as a single 3.5" drive if you go with the 9.5mm depth drives and the 5200rpm drives produce less heat as well, reducing the need for active cooling. The vast majority of SSD's use the 2.5" casing and will consume even less power and produce less heat. Of Course, thats if you can afford 4 SSD's, lol.

IMG_0099.jpg


But you could make a single enclosure for 4x 2.5" drives that takes up the same space as a 3.5" drive. Just a quick draft thrown together in AI...

4x25-0002.png

Edit: Minor change to picture to clarify drive arrangement in mount.
 
Last edited:

Optix

Basket Chassis
Staff member
I was going to ask if you sleeved each cable or if the power supply came that way but now I see you used some NZXT trickery. Looks damn good if the connections are hidden.
 

alchemist_07

Obliviot
Tech Daddy... I would just like to say that when I compare myself and my modding to YOU... I am a noob that is forced to bow in your presence. Keep up the amazing work man. I can not wait for more updates.
 

Tech-Daddy

Tech Monkey
Tech Daddy... I would just like to say that when I compare myself and my modding to YOU... I am a noob that is forced to bow in your presence. Keep up the amazing work man. I can not wait for more updates.


Dood... we all start somewhere! I was once a noob! And there are always people out there that you learn from that will absolutely amaze you. I've just been addicted to this hobby for years, so I have been stubborn as hell at learning stuff and trying out new ideas! ;)

Whatever you do, hold on to that passion for modding. it is a uniquely fun hobby, that just about anyone can do. But... as with any hobby... if you want to get good at it, it takes practice, time and patience. Watch and learn.... and then go find a scrap case and try out stuff.

I am glad that you like my work, I hope that it inspires something in the future from you. That would just be the ultimate for me! :)

Stay tuned!
 

Tech-Daddy

Tech Monkey
The advantage with the 2.5" drives is that you can fit 4 of them in the same space as a single 3.5" drive if you go with the 9.5mm depth drives and the 5200rpm drives produce less heat as well, reducing the need for active cooling. The vast majority of SSD's use the 2.5" casing and will consume even less power and produce less heat. Of Course, thats if you can afford 4 SSD's, lol.

IMG_0099.jpg


But you could make a single enclosure for 4x 2.5" drives that takes up the same space as a 3.5" drive. Just a quick draft thrown together in AI...

4x25-0002.png

Edit: Minor change to picture to clarify drive arrangement in mount.

I just wanted you to know that you *totally* corrupted me on this post! ;)
I have been thinking about this idea... and thinking.... and thinking... and I am going to steal this suggestion and incorporate it! Not exactly as you have it, but it will be as follows:

3 x 2.5" drives:

the SSD that I won with the contest (OS drive)
a Western Digital 320GB Scorpio black (7200 rpm) (Game drive)
a Western Digital 1TB Scorpio Blue (5200 rpm)

those 3 will be mounted in a "UN" rack:
http://www.frozencpu.com/products/9...XVR1-BLK.html?tl=g43c12s906&id=9CeYzym7#blank

and I will mount one 3.5" hard drive under them, my 80GB OEM Raptor. (Game drive)

That will give me more disk space than I currently have, save space, and give me the performance I need on my games and stuff, as well as a repository for my data (stuff that stays pretty static).

:)

Thank you for the inspired post and suggestion. :D:D:D
 

Psi*

Tech Monkey
You reminded me that I wanted to get the GSkill RAM cooler ... 2 just arrived from 'egg. Bit of a pain slipping it under the bundle of wires already in place, but an opportunity to blow the dust out.

Nice looking build. What TIM is under that XT?
 
Top